Futurion Solutions
· Ivan Skachkov · GDPR & Compliance · 23 min read
Self-Hosted CISO Assistant: From Fresh Install to a Working ISO 27001, GDPR and NIS2 Portal
Most CISO Assistant guides stop at the login page. This one starts after it is running and takes a self-hosted install to a usable ISO 27001, GDPR and NIS2 portal, in order.
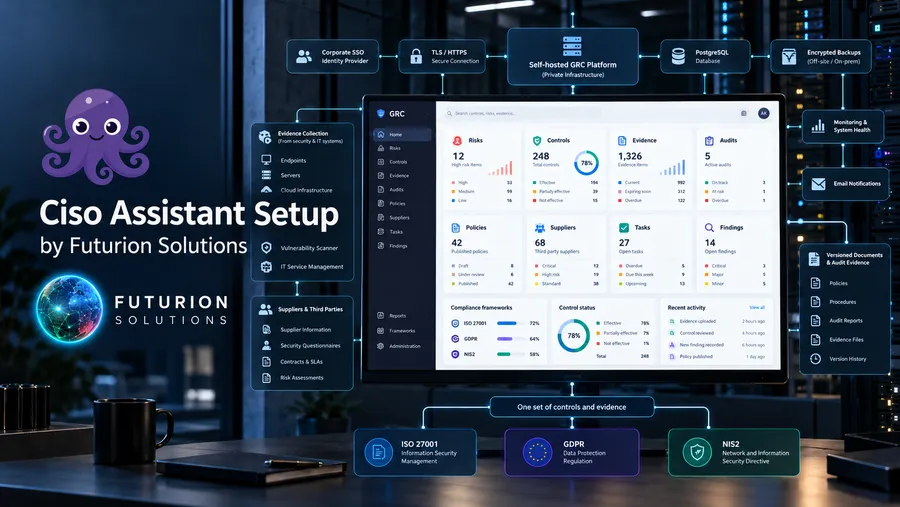
Most CISO Assistant installation guides stop too early.
They show you how to start the containers, open the login page and create an administrator.
Then you are looking at an empty GRC platform.
Now what?
Where do you create the ISO 27001 scope?
Which modules need to be enabled?
Where do you load ISO 27001?
How do you build the Statement of Applicability?
Where does the old Excel risk register go?
How do you create recurring access reviews?
Where do you put audit evidence?
How do you know whether the portal is actually ready to use?
This guide starts after CISO Assistant is running.

It shows the sequence we use to turn a fresh self-hosted CISO Assistant installation into a usable GRC portal.
The examples come from a real Community Edition deployment. Menu names below correspond to CISO Assistant v4.x and can move slightly between releases.
The sequence is:
Do it in that order.
Do not start by uploading documents.
1. Log in and secure the administrator account
Open your CISO Assistant URL.
For example:
https://trust.example.comSign in with the administrator account created during installation.
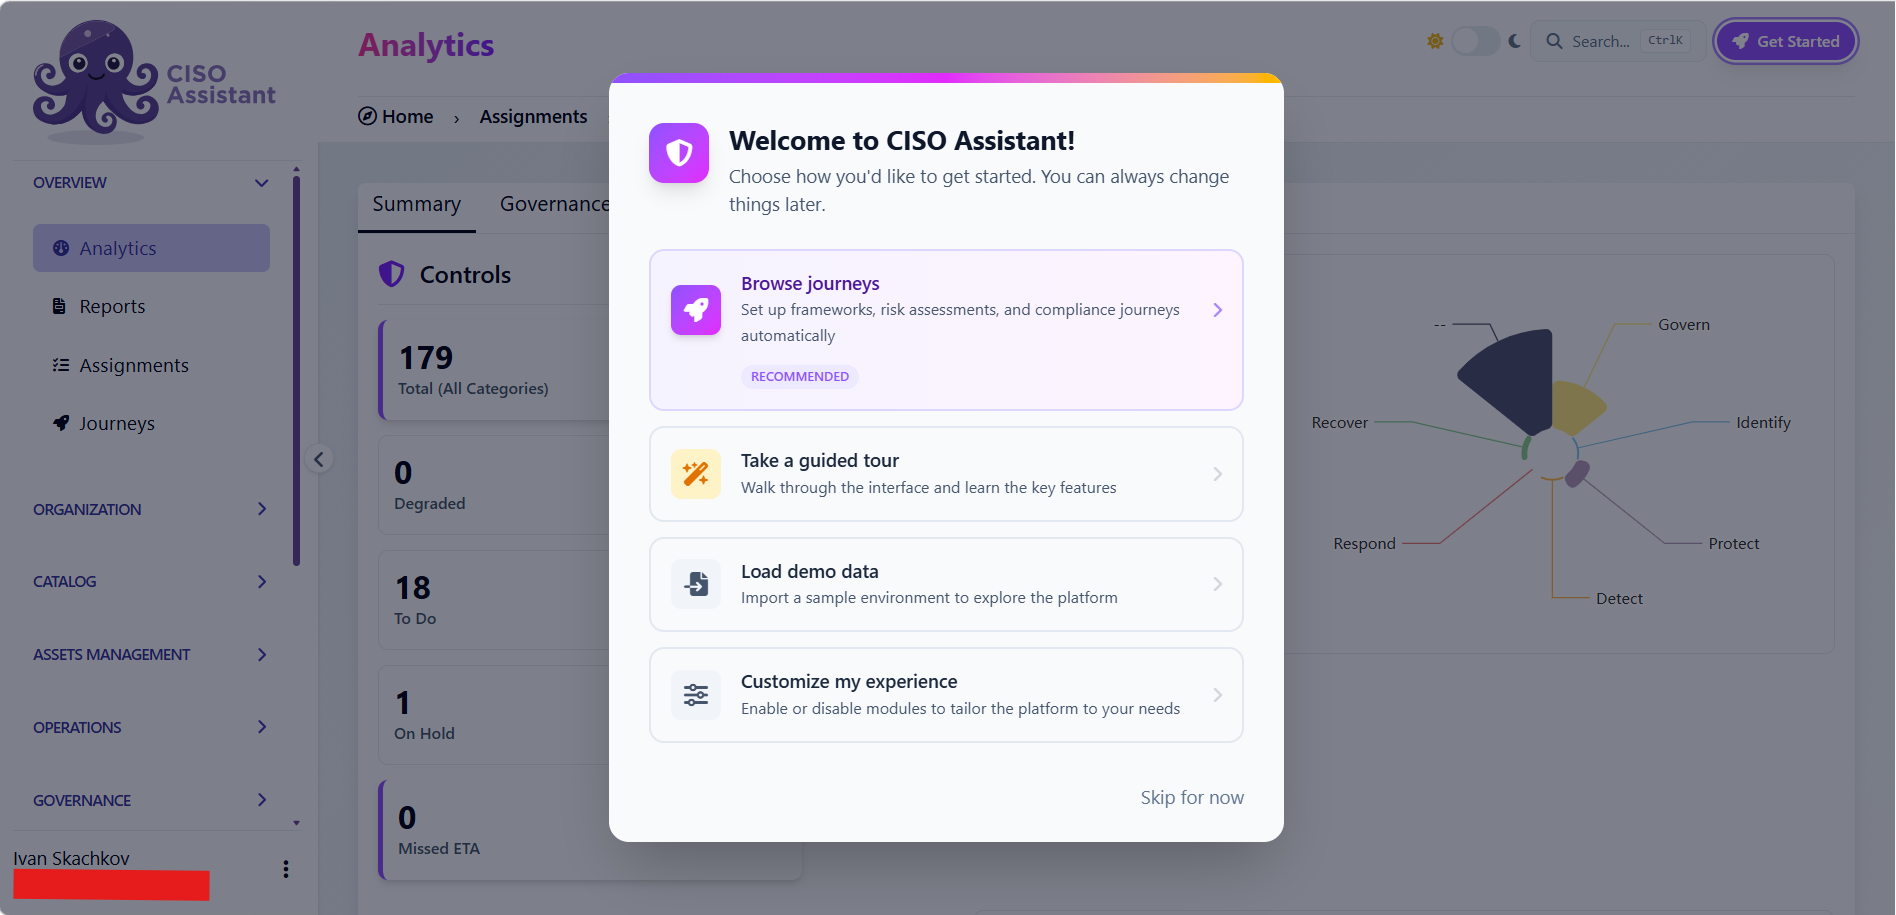
Do not start creating compliance data yet.
First secure this account.
Open your user menu.
Open your profile.
Change the initial administrator password.
Store the new password in your password manager.
Now open:
Profile → Multi-factor authentication
Enable MFA.
Scan the QR code with your authenticator.
Enter the generated six-digit code.
Save the recovery codes somewhere controlled.
Test that you can log out and log back in.
Check before continuing
You should now have:
a working HTTPS portal;
a working administrator login;
MFA enabled;
the password stored outside the server;
recovery information stored safely.
Do not use this emergency administrator as your normal working account.
Later we will create named administrator accounts.
2. Configure the basic portal settings
Open:
Sidebar → Extra → Settings
Open the General tab.
There are several settings here that are easier to configure now than after you have created hundreds of records.
Email notifications
Find:
Notifications → Enable email notifications
Leave this Off until SMTP has been configured and tested.
We will turn it on later.
Asset security scale
Find:
Assets → Security targets scale
Choose the scale used by your existing risk methodology.
For example, our deployment used:
0–3
because the customer’s existing asset register rated confidentiality, integrity and availability from 0 to 3.
Do this before importing assets.
Changing the scale after the asset inventory has been entered creates unnecessary cleanup work.
Partially compliant results
Find:
Audits → Disable “partially compliant”
Leave this Off.
You want Partially compliant available.
It is useful during migration because many controls are neither completely absent nor fully evidenced.
Self-validation
Find:
Workflows → Allow self-validation
Set this to:
Off
The person creating or changing compliance material should not automatically approve their own work.
MFA enforcement
Find:
Security → Enforce multi-factor authentication
Leave this Off for the moment.
Turn it on after the local users who need MFA have completed their first login.
Personal domains
Find:
Workspace & interface → Personal domains
Leave this:
Off
For a corporate ISMS, objects should live in deliberately designed organisational domains, not personal workspaces.
Save the settings.
3. Enable the modules you are actually going to use
Open:
Extra → Settings → Feature flags
A fresh deployment may have many features disabled.
Do not assume that something does not exist because you cannot see it in the sidebar.
Enable the modules you need.
For an ISO 27001 + GDPR deployment, we normally enable the following.
Organization
Turn on:
Operations
Turn on:
Management and Governance
Turn on:
Reports is particularly important because it exposes the Statement of Applicability report later.
Compliance
Turn on:
Risk management
Turn on:
GDPR / Privacy
Turn on:
Extra
Turn on:
Save.
Check
Look at the left sidebar.
You should now see additional areas including things such as:
- Risk
- Compliance
- Operations
- Privacy
- Third parties
- Reports
If Reports is not visible, go back and check the feature flag.
Do not proceed to building the ISO audit until Reports is available.
4. Configure SSO
For a company deployment, do this before creating the normal user population.
The exact identity-provider configuration depends on what you use.
A common setup is Microsoft Entra ID with SAML.
First create the Enterprise Application in Entra.
Then open:
Microsoft Entra admin center → Enterprise applications → your CISO Assistant application → Single sign-on → SAML
Configure the application identifier and reply URL for your portal.
The reply URL follows the CISO Assistant SAML ACS path for your installation.
Copy from Entra:
- Microsoft Entra Identifier
- App Federation Metadata URL
Now return to CISO Assistant.
Open:
Extra → Settings → SSO
Open the SAML configuration.
Fill:
IdP Entity ID
Paste the Microsoft Entra Identifier.
Metadata URL
Paste the App Federation Metadata URL.
SP Entity ID
Use the same external identifier configured in Entra.
Review the attribute mappings.
At minimum, verify that email/UID mapping is correct.
Enable:
SSO auto-provisioning / JIT
With JIT enabled, a new person can be created on first SSO login.
That does not mean the new person should automatically receive access to the ISMS.
The account should initially have no useful permissions until you assign the appropriate group.
Save.
Test it before forcing SSO
Open a private/incognito browser.
Sign in using a normal corporate account.
You should arrive in CISO Assistant.
Log out.
Now test the local emergency administrator account again.
Both should work.
Only after both tests succeed should you enable any setting that forces normal users through SSO.
Common problem: “User not declared”
Check that JIT provisioning is enabled.
Common problem: only some people cannot log in
Check email address casing and mapping between the identity provider and CISO Assistant.
Common problem: login redirects to HTTP or an internal backend hostname
That is normally an external URL / reverse-proxy header problem.
Fix the deployment configuration before continuing.
Common problem: error 500 after SAML login
Recheck:
- Entity ID;
- metadata URL;
- Reply URL;
- attribute mappings.
Do not continue until SSO works reliably.
5. Configure email and test it
CISO Assistant needs email for more than marketing-style notifications.
It is used for operational things such as:
- password reset;
- evidence expiry;
- task notifications;
- due dates;
- findings.
SMTP is configured at deployment level rather than entirely through the web interface.
Use a dedicated service mailbox.
Do not use an employee’s personal mailbox.
After SMTP has been configured on the host, return to:
Extra → Settings → General
Enable:
Notifications → Enable email notifications
Now test it.
Use the password-reset function on a test account.
The test is not:
“The SMTP variables exist.”
The test is:
“An actual message arrived.”
If mail does not arrive, fix it now.
Do not create external local users until password reset and notification email work.
6. Take the first backup
Before building the ISMS, take a known-good backup.
Open:
Extra → Backup & restore
Create a backup.
Keep host-level database backups as well.
The application backup is not a reason to stop backing up PostgreSQL and the evidence volume.
Rule for the rest of the implementation
Take another backup:
- before large imports;
- before risk migration;
- before mass API changes;
- after completing each major phase.
Do not learn whether your backup works on the day you need it.
7. Create the organisational domains
Now we create the access structure.
Open:
Organization → Domains
Click the purple + button.
Create the main ISMS domain first.
Example:
Name
Company - ISMSDescription
Corporate ISMS: audits, policies, corporate risks, suppliers, findings and management reviewCreate IAM groups
On
Click Save.
Now create other domains only where a real access or ownership boundary exists.
For example:
Company - TechnologyCompany - OperationsCompany - Finance
Do not reproduce your entire organisation chart simply because you can.
Domains are primarily access boundaries.
Check
Open:
Organization → Domains
You should see your new domains.
Now open:
Organization → User groups
For each domain, CISO Assistant should have created role groups such as:
- Analyst
- Approver
- Domain manager
- Reader
- Respondent
- Technical tester
If those groups were not created, go back and check whether Create IAM groups was enabled when the domain was created.
8. Create the ISMS perimeter
A domain is not the ISO 27001 scope.
Create the scope separately as a perimeter.
Open:
Organization → Perimeters
Click +.
Create the main ISO 27001 perimeter.
Example:
Name
ISMS-27001Description
Paste the actual approved ISO 27001 scope statement.
Do not write:
Company information systemsunless that is genuinely your approved scope.
Use the wording from your ISMS documentation or certificate.
Domain
Company - ISMSReference ID
PER-ISMS-001Status
ProductionUse Production if this is an already operating ISMS.
Use Design only if the scope genuinely has not gone live yet.
Save.
If you need them, create additional perimeters such as:
GDPR-ProcessingTECH-PlatformOPS-ProductionFIN-Systems
Important
Perimeters are not the same as access boundaries.
If access must be separated, use domains.
9. Remove the demonstration data
Do this before you start putting real company data into the portal.
A fresh installation may contain demonstration objects.
Open:
Organization → Perimeters
Look for demonstration data such as:
EU SaaS StartupOpen it.
Check which objects are linked to it.
Remove the linked demo:
- audits;
- risk assessments;
- assets;
- other sample records.
Then delete the demonstration perimeter.
Check
Search the portal for the sample company name.
Nothing belonging to the sample organisation should remain.
You do not want a fictional SaaS startup appearing in an export given to your ISO auditor.
10. Create your named administrator
Stop using the break-glass account for normal work.
Open:
Organization → Users → Add user
Enter your normal corporate email address.
Use exactly the same email identity used by your SSO provider.
Save.
Open the user.
Open:
User groups
Add:
Global - AdministratorLog out.
Log back in using your named account.
Confirm that you can administer the portal.
From this point, keep the original administrator only for emergencies.
11. Let normal users arrive through SSO
If JIT provisioning is enabled, do not manually create everybody.
Ask the first ISMS user to sign in using SSO.
Now open:
Organization → Users
The new account should exist.
Open it.
Open:
User groups
Assign the required role.
For example:
ISMS manager:
ISMS Domain manager
Security manager:
Technology Domain manager
ISMS Analyst
IT:
Technology Analyst
DPO:
ISMS Analyst
Management:
ISMS Approver
Internal auditor:
Reader
External auditor:
Reader with an expiry date
Check permissions
Use a non-administrator test account.
Confirm that the account can see what it is supposed to see.
Confirm that it cannot edit objects outside its role.
Do this now.
Do not discover your access model is wrong during the certification audit.
12. Check the framework libraries
Open:
Governance → Libraries
Open:
Loaded libraries
Search for:
27001Confirm that:
International standard ISO/IEC 27001:2022
is loaded.
Search:
GDPRConfirm that GDPR is loaded if you need the privacy assessment.
Search:
NIS2Check which NIS2 framework/mapping libraries are present for your version.
Do not unload libraries simply because you are not using them.
Unused mapping libraries do nothing until you actually apply them.
Check the risk matrix
Open:
Catalog → Risk matrices
Look at the available matrices.
If your company uses the standard matrix supplied by CISO Assistant, fine.
If it uses its own approved matrix, stop here and import that matrix before creating risk assessments.
Once a risk assessment is created with a matrix, changing it later is not a trivial correction.
13. Import a custom risk matrix if required
If your existing risk methodology uses its own matrix, prepare it as a CISO Assistant library.
Then open:
Governance → Libraries → Libraries store
Click the Import / Upload button.
Select the library file.
Confirm the import.
Now open:
Loaded libraries
Find your matrix library.
Then open:
Catalog → Risk matrices
Confirm that the matrix appears.
Open it.
Check the orientation visually.
For a 4×4 matrix, check at least:
- low probability + low impact;
- high probability + high impact;
- the treatment-threshold cells.
Do not assume the rows and columns were interpreted correctly.
Check
Now open:
Risk → Risk assessments → +
Your custom matrix should be available in the Risk matrix selector.
Do not create the risk assessment yet.
Close the form.
The point was only to verify that the matrix is available.
14. Start the ISO 27001 journey
If your version contains the ISO 27001 journey, use it.
Open:
Overview → Journeys
Click:
Start a journey
Choose:
ISO 27001:2022 — Full Implementation
Select:
Use an existing domain
Choose your ISMS domain.
Enable:
Create underlying objects
This is important.
If you leave this unchecked, the journey is mainly a checklist.
If you enable it, CISO Assistant creates useful underlying objects.
Leave:
Adjust menu and modules
unchecked if you have already configured your feature flags manually.
Start the journey.
Now inspect what it created
Go through the objects created by the journey.
It may create:
- ISO issues;
- objectives;
- an ISO 27001 audit;
- task templates;
- metrics;
- applied controls;
- a risk assessment;
- a findings binder.
Do not accept everything blindly.
If it created a risk assessment using the standard 5×5 matrix but your organisation uses a custom 4×4 matrix:
Risk → Risk assessments
Open the generated assessment.
Delete it if it contains no real data.
You will create the correct assessment later.
Check
Open:
Compliance → Audits
You should see the ISO 27001 compliance assessment created by the journey.
Keep it.
We will configure it later.
15. Create the ISO context issues
Open:
Governance → Issues (ISO)
Click +.
Create one record for each material internal or external issue.
Example:
Name
Dependence on external contractorsCategory
Choose the appropriate category.
Origin
InternalStatus
ActiveDescription
Explain why this affects the ISMS.
Save.
Create the next issue.
Examples include:
- cyberattack environment;
- cloud dependency;
- staff turnover;
- legal obligations;
- market requirements;
- AI adoption;
- reliance on key suppliers;
- climate-change relevance.
Do not write a textbook SWOT analysis here.
Use the organisation’s actual context assessment.
16. Create interested parties
For each significant interested party, create an Entity.
Open:
Third parties → Entities
Click +.
Examples:
- management;
- employees;
- customers;
- suppliers;
- contractors;
- regulators;
- ICT suppliers.
For each entity, put into the description:
- needs;
- expectations;
- requirements;
- how the ISMS addresses them.
Save.
This gives clause 4.2 somewhere structured to live instead of leaving the entire analysis inside one Word file.
17. Create ISO security objectives
Open:
Governance → Objectives (ISO)
Click +.
Do not invent generic objectives just to fill the screen.
Take the objectives management has actually approved.
Examples:
- complete two phishing simulations;
- achieve a defined MFA coverage;
- perform an annual disaster-recovery test;
- close a specific audit finding;
- reduce high-risk vulnerabilities within the defined SLA.
Enter:
- objective;
- owner;
- target;
- dates;
- status.
Save each one.
18. Import the asset inventory
Take a backup first.
Now open:
Assets management → Assets
Click +.
Start with the important services.
Do not start with every laptop.
Example:
Name
Microsoft 365Description
Explain what the organisation uses it for.
Business value
Explain why the service matters.
Owner
Select the accountable person.
Domain
Choose the correct organisational domain.
Type
Choose Primary or Supporting.
Use Primary for important business services/information.
Use Supporting for systems, software, infrastructure, people or facilities that support those services.
Set the security objectives.
For example:
Confidentiality
2
Integrity
3
Availability
3
If you maintain recovery targets, enter:
- RTO;
- RPO;
- MTD.
Add useful labels such as:
type:saascriticality:criticalclassification:confidentialsubprocessor:yes
Save.
Load order
Do this in this order:
- business services;
- important information assets;
- supporting systems;
- infrastructure;
- important SaaS platforms;
- hardware where it matters to the risk model.
This allows you to link supporting assets to their parent services.
Check
Open the Assets list.
Verify that each important asset has:
- an owner;
- a domain;
- C/I/A values;
- classification;
- recovery data where required.
If an availability-critical service has no recovery target, fix that before continuing.
19. Create policies as managed objects
Open:
Governance → Policies
Click +.
Do not simply upload every Word document.
Create a proper policy record.
Example:
Name
Information Security Policy v2026-01Reference ID
POL-ISP-01Owner
ISMS Manager
Status
ActiveUse Active only if an approved document really exists.
Set:
Start date
Set:
Expiry date
Use the expiry date as the next mandatory review date.
Attach the approved document.
If the authoritative copy stays in SharePoint, put the SharePoint address into:
Link
Save.
Repeat for the main policies:
- Information Security
- Acceptable Use
- Access Control
- Password / Authentication
- Cryptography
- Classification
- Retention
- Backup
- Disaster Recovery
- Asset Management
- Physical Security
- Risk Management
- Vulnerability Management
- Incident Management
- Security Awareness
- Data Protection
- Supplier Security
- Change Management
Add others that actually exist in your organisation.
Check
Open:
Overview → Analytics → Governance
Look at the policy/watch-list information.
A policy approaching its expiry date should be visible as something requiring attention.
That is the behaviour you want.
20. Configure applied controls
Open:
Operations → Applied controls
If you started the ISO journey, you may already have many controls in status To do.
Do not create another copy.
Open an existing control.
Set:
Owner
Set:
Status
Use:
- To do
- In progress
- On hold
- Active
- Degraded
- Deprecated
Only use Active when the control really operates.
Example:
Open the control corresponding to access management.
Set the owner to the security manager.
Add a description of what the organisation actually does.
For example:
Corporate identities are managed through Entra ID. MFA is required. Privileged access requires approval. Leaver accounts are disabled as part of the HR offboarding process. Access is reviewed quarterly.Link relevant assets.
Set dates if appropriate.
Save.
Repeat for the real controls.
Important rule
Do not describe the ISO requirement again.
Describe your implementation.
21. Create the recurring control tasks
Open:
Operations → Tasks
Create a task template.
Start with access review.
Click +.
Name
Quarterly user access reviewRecurrent
Yes
Frequency
Every 3 months
Assigned to
Security Manager
In the description, write the actual procedure.
For example:
- export active users from the identity provider;
- export privileged-role assignments;
- compare with active employees;
- identify inactive or unjustified access;
- ask the responsible manager to confirm retain/remove/change;
- implement changes;
- attach the completed review.
Link the task to the access-control applied control.
Save.
Now create the rest of the real operating calendar.
At minimum consider:
Weekly
vulnerability triage.
Monthly
asset inventory check;
patch review;
device posture;
KPI collection;
threat-intelligence review.
Quarterly
access review;
operational control review;
backup restore test;
incident report.
Yearly
risk review;
internal audit;
management review;
policy review;
supplier assessment;
penetration test;
security awareness;
DR exercise.
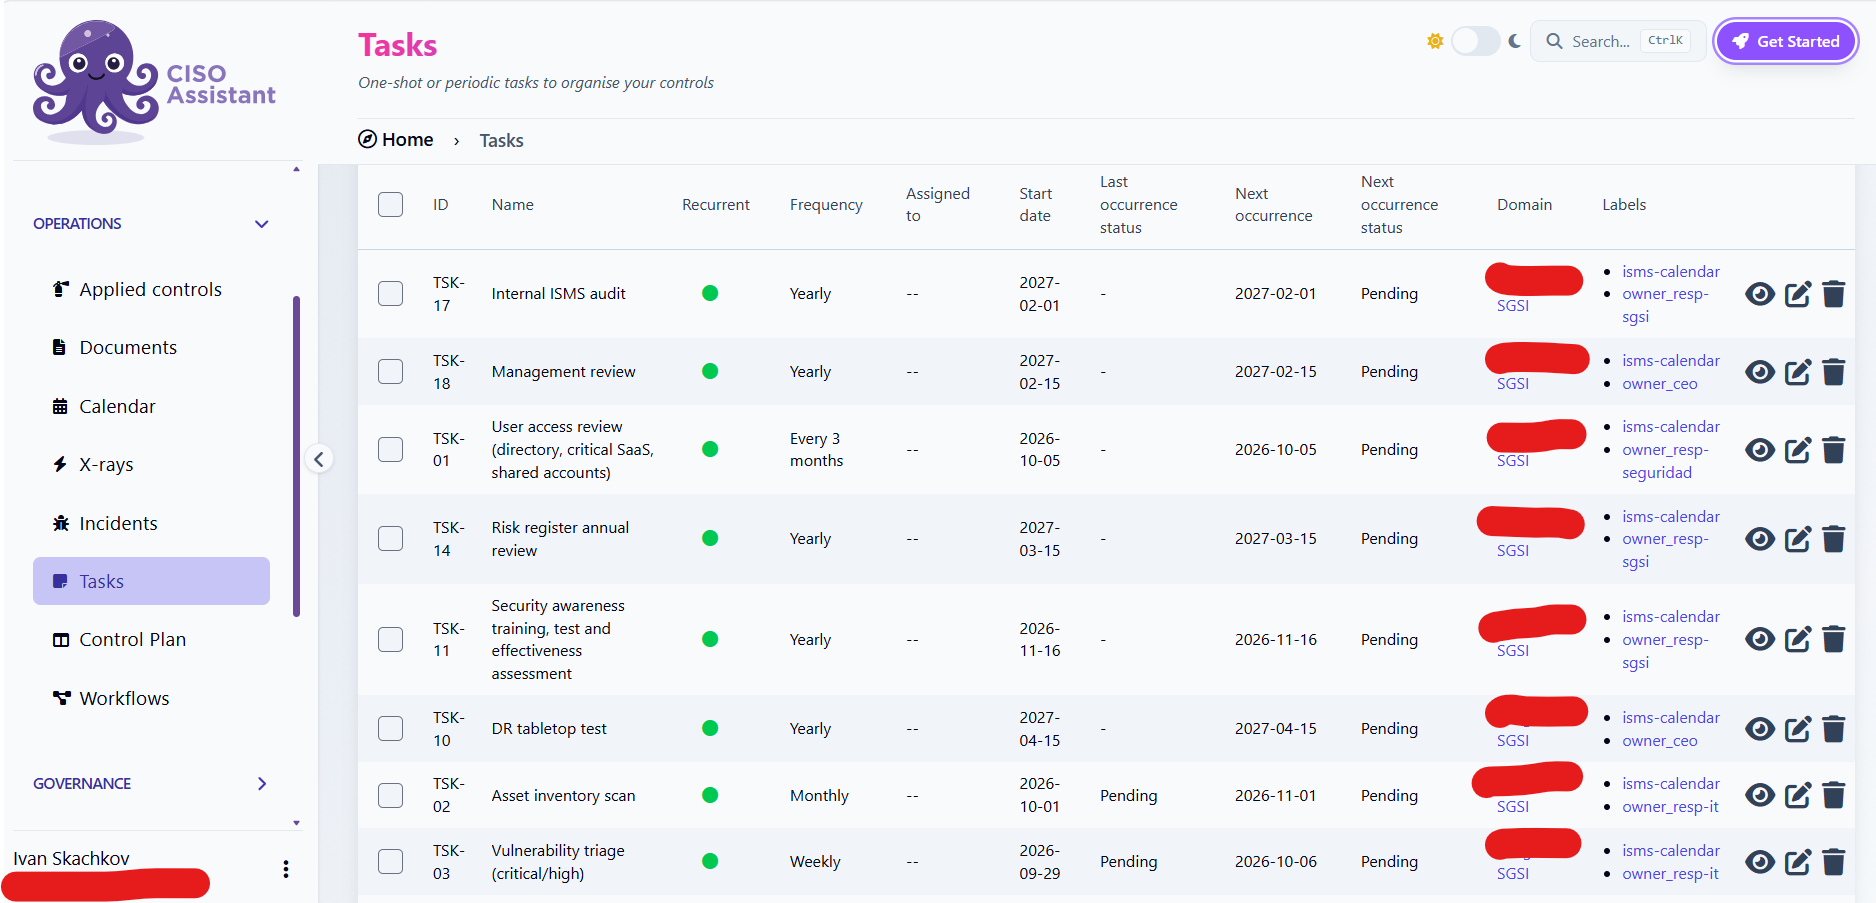
Now open:
Operations → Control Plan
You should see upcoming and overdue work.
Open:
Operations → Calendar
Verify the dates.
That is the moment the ISMS begins to behave like an operating system instead of a document archive.
22. Create the real risk assessment
Now that the assets, controls and matrix exist, create the risk assessment.
Open:
Risk → Risk assessments
Click +.
Example:
Name
2026 Technology Risk AssessmentReference ID
RA-2026-TECHPerimeter
TECH-PlatformVersion
2026.1Status
In progressRisk matrix
Select the matrix approved for your organisation.
Be careful here.
The matrix is an important structural choice.
Check it before saving.
Set:
Authors
Set:
Reviewers
Set:
Due date
Set:
Risk tolerance
according to the approved methodology.
Save.
23. Enter a risk scenario — click by click
Open:
Risk → Risk scenarios
Click +.
Example:
Name
Loss of power to critical infrastructureRisk assessment
Select the assessment you just created.
Reference
RS-TECH-001Threat
Select the appropriate threat.
Click Save.
Now open the scenario.
Click Edit.
Set:
Owner
Select the relevant asset.
Select or create the vulnerability.
Example:
UPS cannot sustain the required load during power failureNow go to the Current risk section.
Choose the relevant existing controls.
Set:
Current probability
Set:
Current impact
CISO Assistant should calculate the risk level from the matrix.
Now go to Residual risk.
If treatment is required, add an extra control.
Example:
Replace and test UPSSet:
- owner;
- priority;
- ETA;
- cost if used;
- status.
Now set the expected residual probability and residual impact.
Set:
Treatment status
For example:
MitigatedAdd the justification.
Save.
Check
The treatment control should also appear in:
Operations → Applied controls
The scenario should show both current and residual risk.
If either is missing, do not move to the next scenario.
24. Create formal risk acceptance
Where residual risk is being accepted, do not leave the decision buried in a meeting minute.
Open:
Governance → Risk acceptances
Click +.
Enter:
Name
Residual risk acceptance – 2026 TechnologyApprover
The management user authorised to accept the risk.
Risk scenarios
Select the scenarios being accepted.
Justification
Reference the treatment decision.
Expiry date
Set the next review date.
Save.
The normal flow is:
Created → Submitted → Accepted
The analyst submits.
The approver decides.
Now open:
Operations → X-rays
Check for problems such as:
- scenario says Accepted but has no acceptance;
- acceptance has expired;
- other inconsistent risk states.
Fix the X-rays before continuing.
25. Configure the ISO 27001 audit
Open:
Compliance → Audits
If the ISO journey created an audit, open that one.
Do not create a duplicate.
Otherwise click +.
Enter:
Name
ISO 27001:2022 – ISMS 2026Reference ID
AUD-27001-2026Perimeter
ISMS-27001Target framework
International standard ISO/IEC 27001:2022Selected implementation groups
Choose both:
- Clauses
- Statement of Applicability (SoA)
Version
2026.1Status
In progressAuthors
ISMS team
Reviewers
Management / internal auditor
If you have not already generated framework controls, enable:
Suggest controls
Save.
Check
The audit page should contain:
framework;
perimeter;
authors;
reviewers;
maturity/compliance information;
progress;
associated requirements.
You should see requirements covering clauses 4–10 and the Annex A controls.
26. Assess one ISO control properly
Do one control completely before trying to fill 93 rows.
In:
Compliance → Audits → your ISO audit
scroll to:
Associated requirements
Open:
5.15 Access control
A panel opens.
Open the:
Applied controls
tab.
Attach your existing access-control implementation.
Do not create another duplicate control unless one genuinely does not exist.
Open:
Evidences
Link evidence if appropriate.
Now set:
Status
This is the workflow state:
To do
In progress
In review
Done
Now set:
Result
This is the compliance conclusion:
Compliant
Partially compliant
Non compliant
Not applicable
Not assessed
Do not confuse these fields.
A requirement can be:
Status: Done
and:
Result: Non compliant
because the assessment work has been completed and the conclusion is that the company does not comply.
Now fill:
Observation
Write the actual justification.
This text later feeds the Statement of Applicability.
Save.
Your rule for Compliant
Use Compliant only when:
the control exists;
it is Active;
the evidence is current;
the implementation actually satisfies the requirement.
If something is still being remediated, use Partially compliant or Non compliant as appropriate.
Do not mark it compliant because “we have a policy about it.”
27. Build the Statement of Applicability
Work through Annex A.
For each control:
- open the requirement;
- decide applicability;
- attach the relevant applied control;
- attach current evidence;
- write the justification;
- set Result;
- set workflow Status;
- save.
For a non-applicable control, choose:
Result → Not applicable
Then write why in Observation.
For example, if outsourced software development genuinely does not occur:
The organisation does not outsource software development. Software development activities are performed internally.Do not enter:
N/AThat is not a justification.
28. Export the real SoA
Once the assessment is populated, open:
Overview → Reports
Choose:
Statement of Applicability
Select your audit.
Optionally select the relevant risk assessments.
Select the SoA implementation group.
Click:
Render
Review the columns.
You should see information such as:
- reference;
- applicable;
- justification;
- implementation;
- reference control;
- additional controls;
- risk coverage.
Now export the report to PDF.
Open the PDF.
Read several rows.
Make sure the Observation text you entered actually produces a useful SoA.
If the PDF is full of empty or useless justifications, go back to the audit and correct the records.
Do not manually edit the exported PDF to hide weak data.
Fix the source.
29. Add evidence from the control
The easiest way to manage evidence is from the control it supports.
Open:
Operations → Applied controls
Open a control.
Open the:
Evidences
tab.
Click:
+ Add evidence
Example:
Name
EV-ACC-01-access-reviewDescription
Quarterly review of Entra ID users and privileged rolesUpload the attachment or add the controlled source link.
Set:
Owner
Set:
Status
For approved evidence:
ApprovedSet:
Expiry date
For a quarterly access review, use roughly three months.
Save.
Renew evidence correctly
Three months later, do not create:
EV-ACC-02Open the existing evidence record.
Add a new revision.
Attach the new quarter’s file.
Record the version/date.
Keep one stable evidence object and renew it with revisions.
That gives you history without filling the system with duplicate records.
30. Test evidence expiry
Create a temporary evidence item with a near expiry date.
Verify that it appears in the appropriate watch/expiry views.
The operating model should be:
current evidence → valid control proof.
expired evidence → requires review.
The system should make stale evidence visible.
Do not rely on somebody remembering the date from the filename.
31. Build the GDPR register
Enable the Privacy features first if you have not already done so.
Now use this order.
Purposes
Open:
Privacy → Purposes
Click +.
Create purposes such as:
- customer service delivery;
- employee administration;
- invoicing;
- marketing;
- supplier management.
Save.
Personal data
Open:
Privacy → Personal data
Click +.
Create categories.
Examples:
- employee identification data;
- customer contact data;
- billing information;
- authentication logs.
Set retention and sensitivity where available.
Save.
Processing activities
Open:
Privacy → Processings
Click +.
For each processing activity fill:
- name;
- description;
- legal basis;
- data subjects;
- personal-data categories;
- purposes;
- recipients;
- international transfers;
- retention;
- owner;
- security measures.
For security measures, link the applied controls that already exist.
Do not rebuild separate GDPR access-control and encryption controls if the ISO controls already perform the job.
Save.
32. Test a data-subject request
Open:
Privacy → Right requests
Click +.
Create a test request.
Set the request type.
For example:
AccessEnter only the personal information required to manage the request.
Set:
Received date
Set:
Due date
according to the legal/procedural requirement.
Assign the owner.
Link the relevant processing activity.
Save.
Now make sure the due date is visible to the responsible user.
Once confirmed, remove the test record if it is not a real case.
33. Configure the breach register
Open:
Privacy → Data breaches
Click +.
Review the fields before the organisation has a real breach.
You should know where to record:
- detection time;
- description;
- affected data;
- affected people;
- consequences;
- containment;
- notification decision;
- authority notification;
- communication to affected people.
Do not discover the data-breach form for the first time during an incident.
34. Create the GDPR audit
Open:
Compliance → Audits
Click +.
Select:
Framework → GDPR
Select:
Perimeter → GDPR-Processing
Set the DPO/privacy lead as author.
Set the appropriate management reviewer.
Save.
Now assess the requirements exactly as you did for ISO 27001.
Reuse the controls you already built.
That is one of the main reasons for using a GRC platform instead of separate GDPR and ISO spreadsheets.
35. Build the supplier register
Open:
Third parties → Entities
Click +.
Start with important suppliers.
Enter:
Name
Description
Domain
Mission
Owner
Set the available criticality/risk inputs.
Save.
Now open:
Third parties → Solutions
Create the service you buy from that entity.
For example:
Entity:
MicrosoftSolution:
Microsoft 365Another example:
Entity:
AWSSolution:
S3 backup storageNow open:
Third parties → Contracts
Create the associated contract.
Set:
- start date;
- renewal/expiry where applicable;
- owner.
Attach or link the contract/DPA as evidence.
36. Create a supplier assessment
Open:
Third parties → Entity assessments
Click +.
Example:
Name
AWS 2026 Security ReviewPerimeter
ISMS-27001Entity
AWSFramework / questionnaire
Choose the vendor questionnaire you use.
Authors
Reviewers
Representative
If the supplier will answer directly.
Expiry date
For critical/high suppliers, normally set the next required review date.
Complete the assessment.
Set the conclusion.
Save.
Check
The supplier record should now tell you:
what you buy;
who owns the relationship;
what contract exists;
what assessment was performed;
what evidence was reviewed;
when reassessment is due.
If the answer to any of those is “look in the supplier folder,” migration is not finished.
37. Configure incidents
Open:
Operations → Incidents
Click +.
Review the fields.
Your incident record should capture at least:
- name;
- description;
- severity;
- status;
- detection source;
- owner;
- affected assets;
- evidence;
- timeline.
If your operational ticket remains in Freshservice, Jira, osTicket or another tool, keep it there.
Use CISO Assistant to hold the GRC record and link to the operational ticket.
Do not force your technical incident team to abandon a working incident-response tool merely because the GRC platform has an Incident object.
38. Create findings binders
Open:
Governance → Findings binders
Create one binder for each major source.
Examples:
External certification audit 2026Internal audit 2026Penetration test 2026VulnerabilitiesContinuous control monitoring
Now create the findings.
For each finding record:
- original finding;
- reference;
- related requirement;
- owner;
- priority;
- target date;
- root cause;
- corrective control.
Do not mark the finding Closed merely because somebody says it has been fixed.
Attach effectiveness evidence first.
Then close it.
39. Configure security exceptions
Open:
Governance → Exceptions
Click +.
Example:
Name
Legacy system cannot enforce current password policyDescription
Explain the actual exception.
Owner
Approver
Severity
Status
Expiration date
Never create permanent exceptions.
Link:
- affected control;
- affected asset;
- risk scenario;
- compensating evidence.
Save.
The corresponding risk should also exist in the risk register.
An exception is not a magic button that makes a risk disappear.
40. Run the internal audit from the portal
Before the internal audit, create a Reader account for the auditor or provide controlled exports.
The auditor should work from the current ISO audit.
Open:
Compliance → Audits → AUD-27001-2026
Review each sampled requirement.
Reviewer comments go into Observation or into a Finding where a discrepancy exists.
Attach the internal audit report as evidence against clause 9.2.
When the audit has been formally signed off:
set the audit:
Status → Done
then enable:
Locked
Now the year’s assessment is frozen.
Do not keep editing the signed-off audit.
For the next cycle, create a new audit using the previous one as the baseline.
41. Prepare the management review from live data
Before the management review, open:
Operations → X-rays
Resolve data-quality issues.
Open:
Operations → Control Plan
Look for overdue activities.
Open:
Overview → Analytics
Review Governance, Risk and Compliance.
Export:
- open actions;
- audit status;
- findings;
- SoA;
- supplier assessments;
- risk assessment;
- objectives;
- metrics.
The management review should consume this live information.
After the meeting, every management decision that requires work should become either:
- an applied control;
- a task;
- a risk decision;
- a finding/action.
Give it:
- an owner;
- an ETA.
Attach the approved meeting minutes as evidence against ISO 27001 clause 9.3.
42. Configure the system for day-to-day operation
At this point the installation is no longer the project.
Running it is.
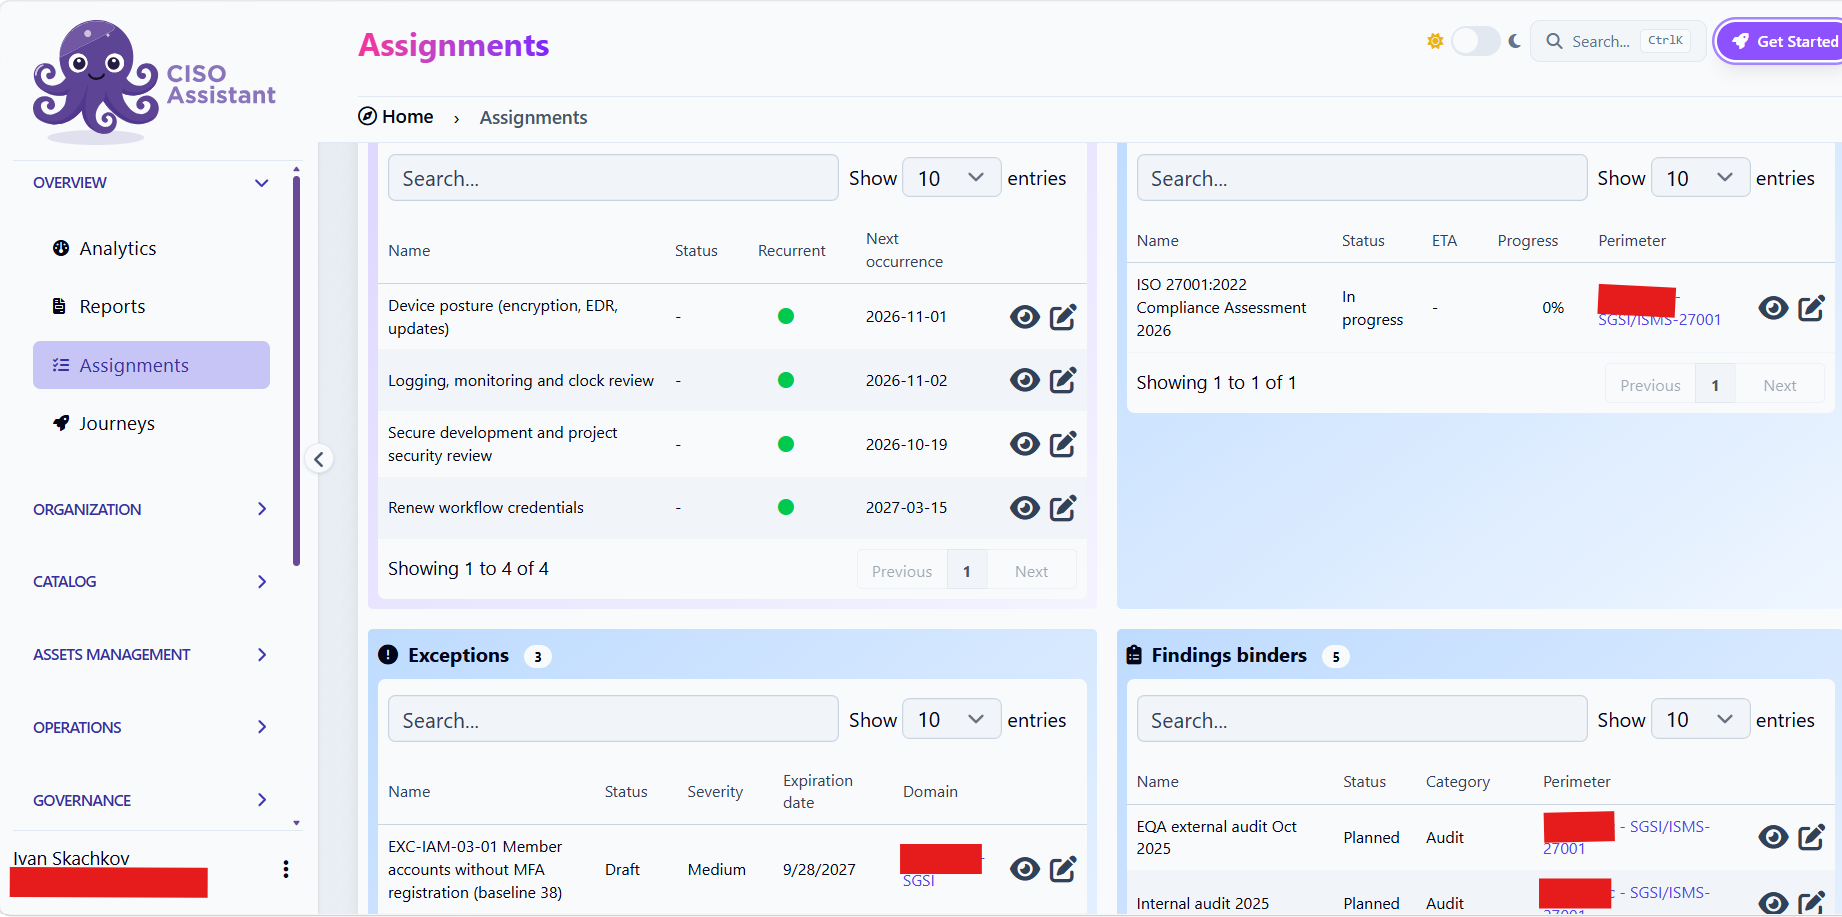
Open:
Operations → Control Plan
This should become a normal working screen.
Someone must review it.
Open:
Overview → Analytics
Someone must review expiring material.
Open:
Operations → X-rays
Someone must resolve inconsistencies.
Review:
Risk acceptances
Someone must renew or revoke expiring acceptances.
Review:
Third parties → Entity assessments
Someone must reassess suppliers.
Review:
Governance → Policies
Someone must update expiring policies.
If nobody owns those activities, the portal will slowly turn back into the same stale compliance system you were trying to replace.
43. Four weeks before the certification or surveillance audit
Run this checklist in the portal.
Policies
Open the Governance watch list.
There should be no unexplained expired policy.
Evidence
Filter evidence for expired or missing records.
Renew what is legitimately due.
Do not backdate evidence.
Applied controls
Open:
Operations → Applied controls
Filter for:
Degraded
Investigate every one.
Tasks
Open:
Operations → Control Plan
There should be no unexplained overdue recurring obligation.
Risks
Open each risk assessment.
Check that it has been reviewed within the required cycle.
Check High/Very High residual risks.
Open:
Governance → Risk acceptances
Make sure required acceptances exist and have not expired.
Run:
Operations → X-rays
Resolve inconsistencies.
Findings
Open the last certification/internal audit binder.
Every finding claimed as closed should have effectiveness evidence.
Statement of Applicability
Open:
Overview → Reports → Statement of Applicability
Render it again.
Read the N/A rows.
Every N/A needs an actual justification.
Read several Compliant rows.
Make sure they point to real controls and evidence.
Internal audit and management review
Make sure both have occurred within the required cycle and that their evidence is attached.
Suppliers
Check that required annual supplier reviews are complete.
Owners
Check that controls, risks, policies and evidence do not belong to somebody who left six months ago.
44. Give the external auditor access
If the auditor needs portal access:
Open:
Organization → Users → Add user
Create the auditor account.
Set an:
Expiry date
Add:
Reader
on the required domains.
Do not give Analyst or Administrator because it is easier.
Test the auditor account yourself before the audit begins.
If force-SSO is enabled and the auditor is external, either:
- invite the auditor through your identity provider as a guest;
- or use controlled exports.
Do not disable SSO for the entire company simply to accommodate one external auditor.
After the audit, remove their access.
Keep the removal record as access-review evidence.
45. What “finished” looks like
You do not have a finished CISO Assistant deployment because the home page opens.
You have a finished first implementation when somebody can open the portal and answer:
What is our ISO 27001 scope?
Open the perimeter.
Which policies need review?
Open Policies / Watch list.
Which controls are not working?
Open Applied controls and filter Degraded.
Which compliance work is overdue?
Open Control Plan.
Which risks remain high?
Open Risk assessments.
Who accepted them?
Open Risk acceptances.
Why is Annex A control 8.30 not applicable?
Open the ISO audit requirement.
Show me the Statement of Applicability.
Open Reports → Statement of Applicability.
Show me the latest access review.
Open the access-control evidence.
When does it expire?
Read the evidence record.
Which suppliers need to be reviewed this year?
Open Entity assessments.
What findings remain open from the previous audit?
Open the findings binder.
What will happen next month even if the ISMS manager forgets?
Open Tasks and Control Plan.
That is the point.
The goal of self-hosting CISO Assistant is not to have another application running on a server.
The goal is to get the compliance process out of people’s heads, spreadsheets and folder structures and put it into a system that tells you what exists, who owns it, whether it is current and what has to happen next.
Where Futurion Solutions comes in
This is also why our CISO Assistant work is not sold as a Docker installation.
We deploy the platform, but the deployment is only the beginning.
The actual engagement covers:
That includes taking the existing Excel/Word/SharePoint system and turning it into the objects described in this guide: domains, perimeters, assets, policies, controls, risks, audits, evidence, supplier assessments, findings and recurring work.
Where useful, we then connect the portal to the systems that already contain compliance evidence so recurring checks do not depend on somebody exporting the same report every month.
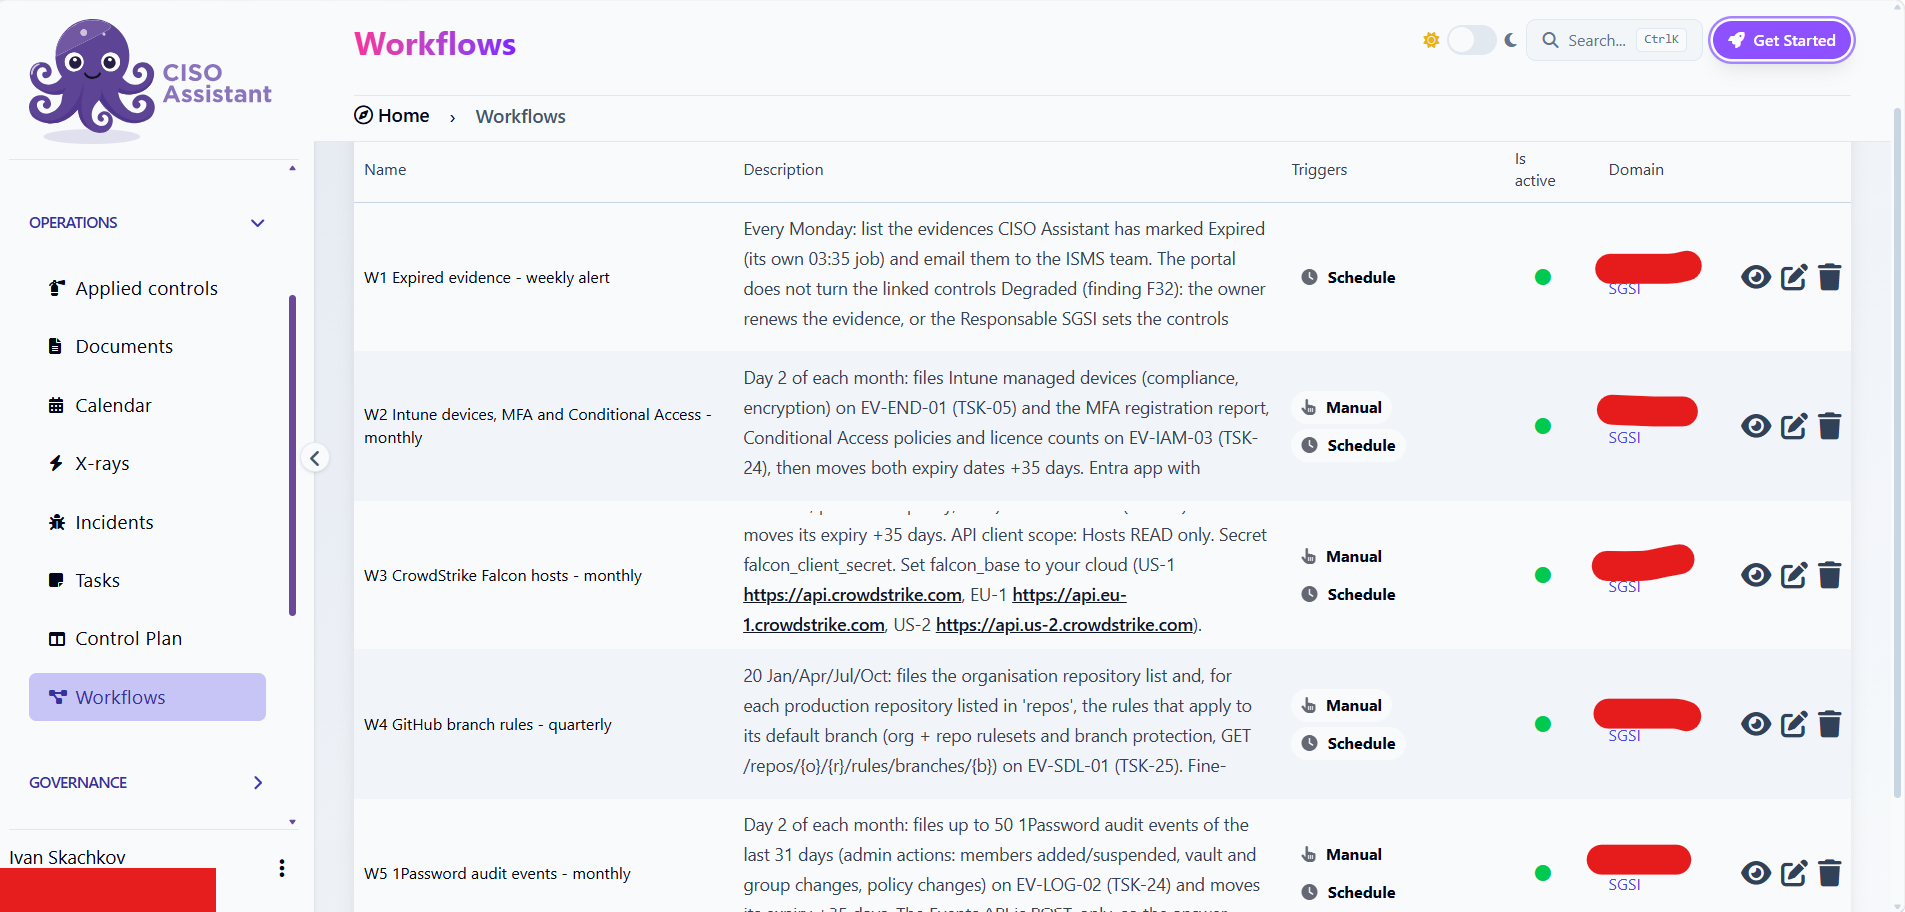
The finished result should be something the client’s own team can operate after handover.